Forum board: Quilt Assistant
For anything related to the QuiltAssistant software.
Tutorial: Paper piecing with QuiltAssistant, part 2
Author: 2009-11-22
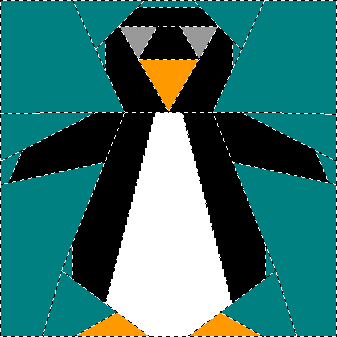
In the first part of this tutorial, you learned how to create your own Paper Piecing design. In this part, for which you need at least QuiltAssistant v2.20, you will learn how to quickly divide your design into numbered segments and make a perfect print-out.To follow along, please download this example file of a pinguin (right-click on the text, then choose 'Save Target As...' to store the file pp-pinguin.qa2). When you open this file with QuiltAssistant, you should see this design:
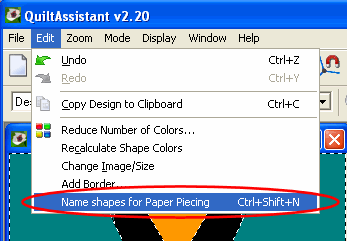
We want to make it suitable for Paper Piecing as soon as possible, so go to the Edit menu and choose Name shapes for Paper Piecing.
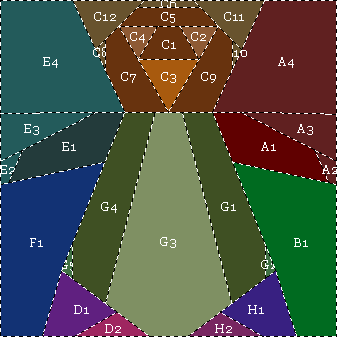
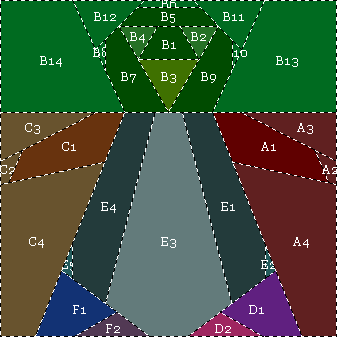
When you do this, QuiltAssistant switches to Mode -> Naming and tries to find the best way to divide the design into segments and name all the pieces. Different segments are shown in different colors.
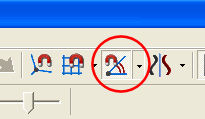
When you look at this result you will see some flaws, the segments aren't quite right. This is because there are some intentional mistakes in the design. Let's see if we can find them. Switch to Mode -> Edit (press the E key), then switch on Snap to Angle:
Now QuiltAssistant will show you the imperfections in the design:
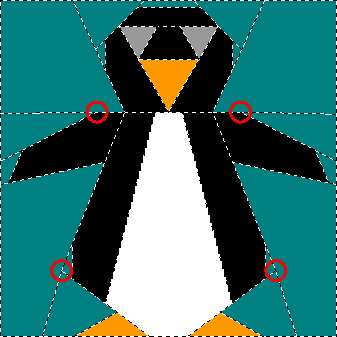
The red circles show places where lines meet at a slight angle, instead of being straight. To correct the top-left problem, follow the line going left from that circle to the edge of the design. Click and drag the point on the edge to correct the angle of that line. When you get it right, QuiltAssistant will show red straight-line markers like so:
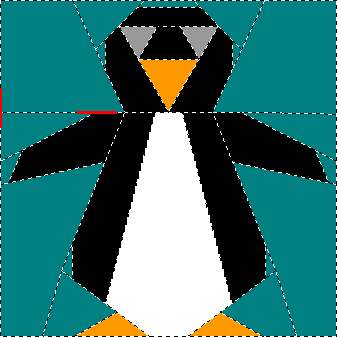
Knowing which points to move to fix these issues takes some practice and experience, but in this case you should only move points at the very edge of the design to fix the remaining problems.
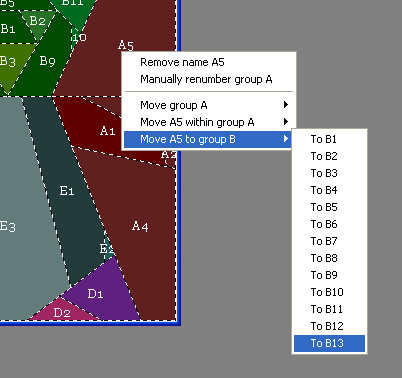
When all circles are gone, we try Edit -> Name shapes for Paper Piecing again:

The result is better this time, but still not perfect. We will need to help QuiltAssistant manually to get all segments as they should be. First, right-click on the shape labeled A5 (top-right). From the menu, choose Move A5 to group B -> To B13.
Repeat this for the shape C5, right-click and choose Move C5 to group B -> To B14. Now the design should be ready for printing, looking like this:
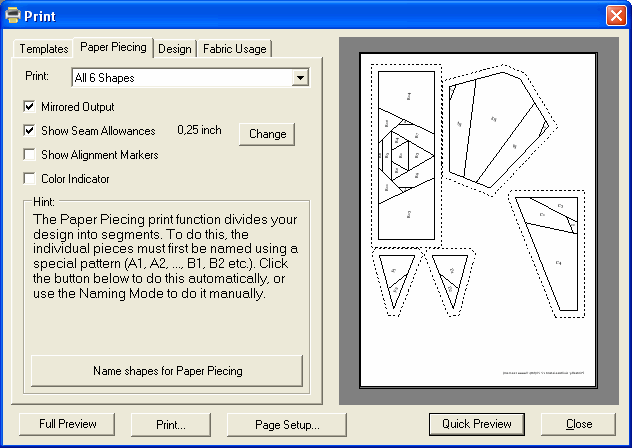
Choose File -> Print, then click on the tab Paper Piecing to print the segments: